Introduction
Many people use Outlook to manage their emails. It allows users to send/receive emails without the need to open a web-browser or logging into some kind of Webmail. In this tutorial, we will learn how to setup email on Outlook.
In this particular tutorial, we will use an example of an email account created on cPanel, however, similar steps apply to all other email services also.
What you’ll need
Before you begin this guide you’ll need the following:
- Outlook installed on your computer.
- An active email account in your external email provider.
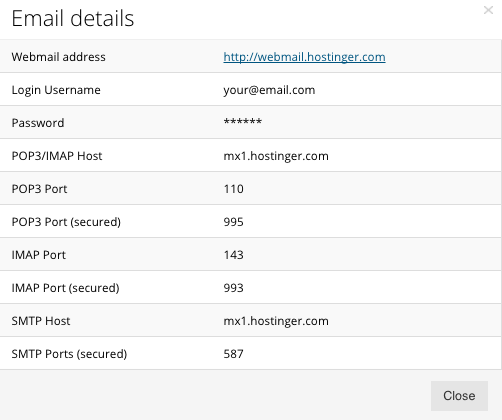
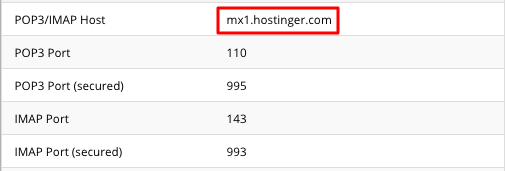
- Write down this information or copy paste it to a text editor on your computer. You will need it in the next step.
- Copy the information and paste it to any text editor on your computer or simply leave the page open for further use.
Step 2 — Setting up an Email Account on Outlook.
In this example we will use Outlook 2013, however, the same steps apply to other versions also.
- If you opened Outlook for the first time, you should see a Welcome message. Click Next.

- You now should see a window with a question Do you want to set up Outlook to connect to an email account?. Choose Yes and click Next.

- (Optional) If this is not the first time you open Outlook and you already have email accounts configured there, to add a new account you need to click File in the upper left corner of the screen.
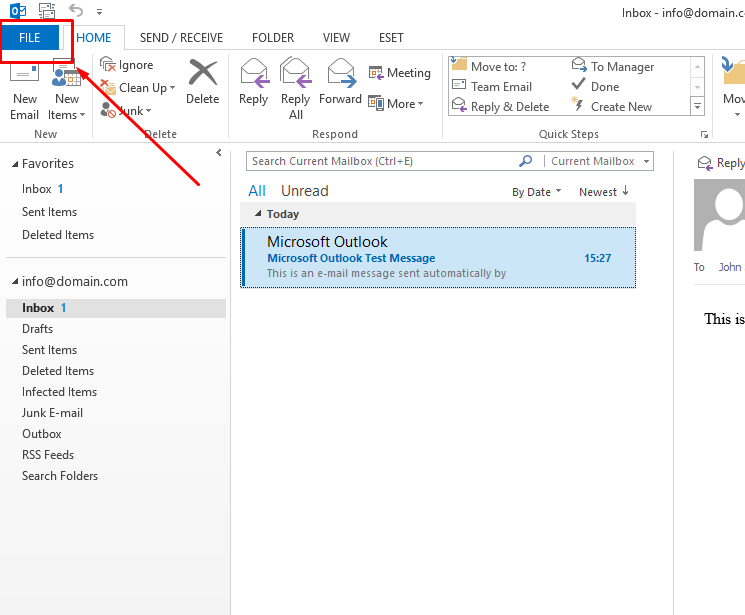
And then click Add Account to configure a new email account:

- (Optional) If this is not the first time you open Outlook and you already have email accounts configured there, to add a new account you need to click File in the upper left corner of the screen.
- In the next page, you will find 2 options. In this tutorial, we will use Manual setup or additional server types.
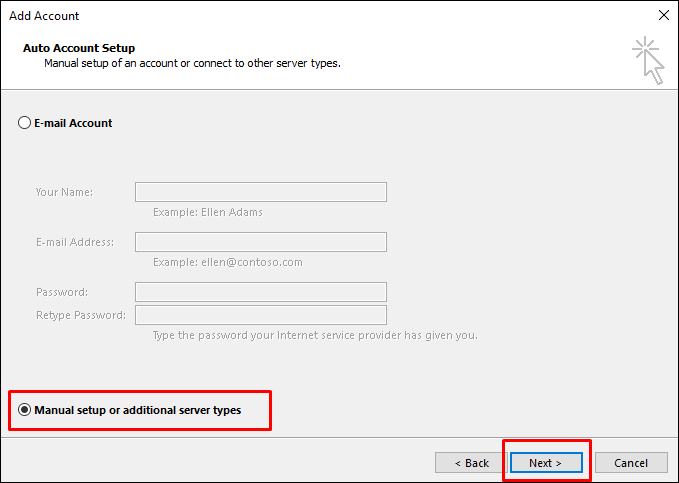
Keep in mind that the first option attempts to automatically configure your email. You do not need to fill in server details, only your email and password. However, in most cases, it is recommended to set up the email account manually so all configuration settings would be correct.
Click Next. - Now you will need to choose the service for which you are configuring the email account. Choose POP or IMAP and click Next.

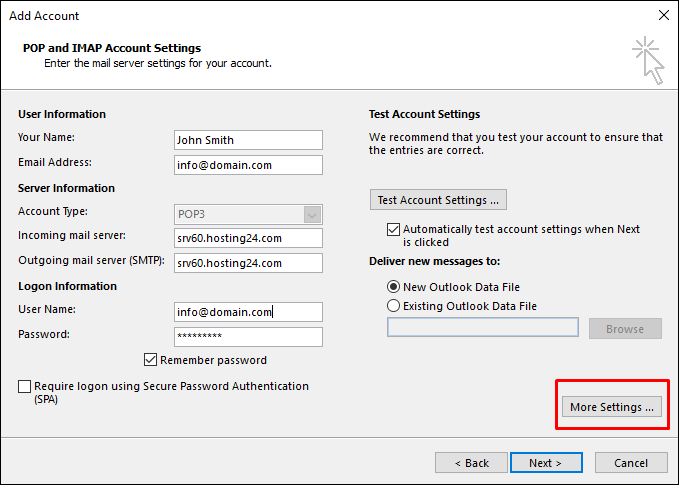
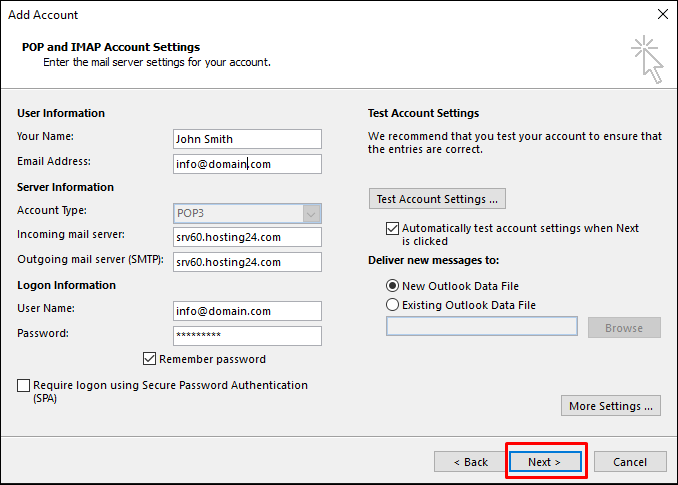
- In this step it is necessary to provide server details (you collected them in Step 1):

- Your Name – This name will be displayed to the recipient when you send your messages, you can choose it yourself.
- Email Address – Fill in the email address you are setting up.
- Account Type – This option depends on you. Most of email/hosting providers offer to choose between POP3 and IMAP and there is no one right opinion on which one to use. You can learn about differences between two protocols here: Differences between POP3 and IMAP. However, for a regular user, it does not make a difference, really. We will choose POP3 in this example.
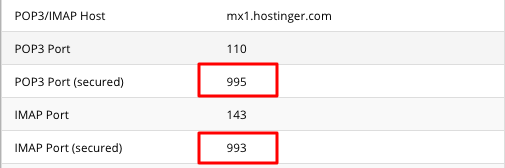
- For Incoming mail server field please fill in Incoming Server hostname from details collected in Step 1:
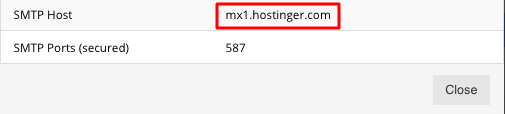
- For Outgoing mail server (SMTP) field please fill in Outgoing Server hostname from details collected in Step 1:

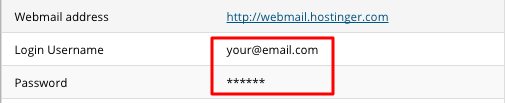
- For Logon information use the username and password of your email account at the external email provider:
- Do not forget to check Remember password checkbox so you wouldn’t need to fill in your password everytime.IMPORTANT! Do not click Next just yet! Before that, we need to configure additional server options. Click More Settings …:
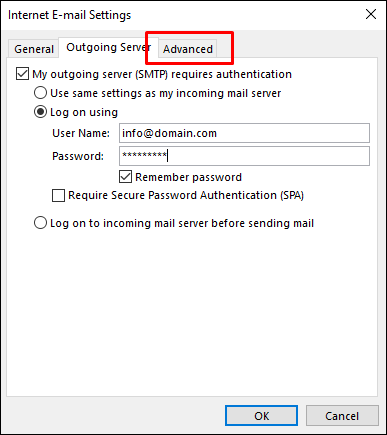
- Click Outgoing Server in the window which popped up.
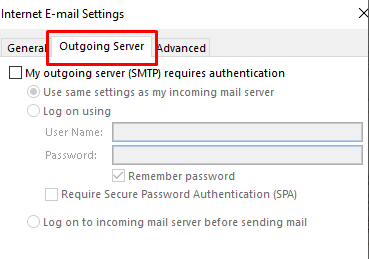
In this window you need to:- Check the My outgoing server (SMTP) requires authentication checkbox. This is necessary if your email/hosting provider requires SMTP authentication.
- Select Log on using and fill in your email account details. Use the username and password of your email account provided by your external email provider:
- Do not forget to check Remember password checkbox so you wouldn’t need to fill in your password everytime.The window should be completed like in the screenshot below. When you are done, click Advanced:
- In this step, you will need to fill in the Ports of both incoming and outgoing mail servers (You have collected this information in Step 1).
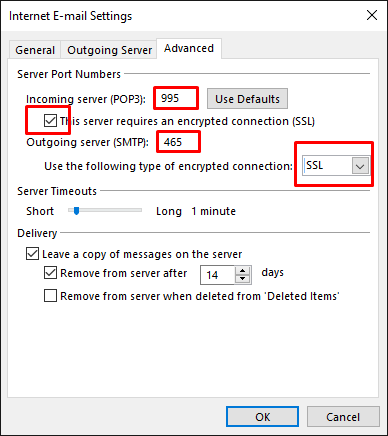
- For Incoming server field fill in Incoming Server port (depends on which Account typeyou chose – POP3 or IMAP) from details collected in Step 1:
- For Outgoing server (SMTP) field fill in Outgoing Server port from details collected in Step 1:
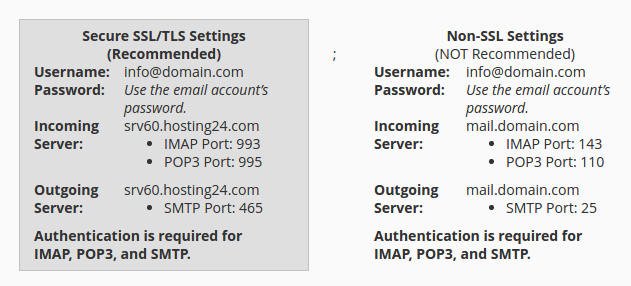
- IMPORTANT! If you used the Secure SSL/TLS settings when collecting configuration details from your external email service provider, you MUST check This server requires an encrypted connection (SSL) checkbox and select SSL for Use the following type of encrypted connection field.
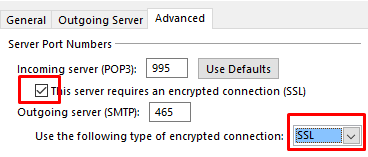
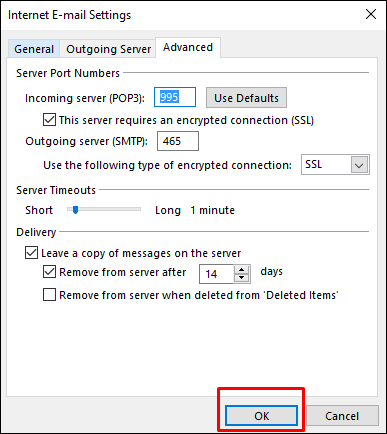
Alternatively, if you used the Not secure configuration settings, leave these options unchanged. - (Optional) Under section Delivery, you can make additional changes related to emails on the original server. By checking Leave a copy of messages on the server, you will ensure that a copy of each email will be left on the original email server. Basically, you will have 2 copies of the same email. One in Outlook and another one in your email provider platform.

- For Incoming server field fill in Incoming Server port (depends on which Account typeyou chose – POP3 or IMAP) from details collected in Step 1:
- When you have everything filled up, click OK.
- You will then be returned to the previous page. Click Next.
- Outlook will now automatically check both sending and receiving emails of the email account you have just configured. If both tests are successful you should see results like these:
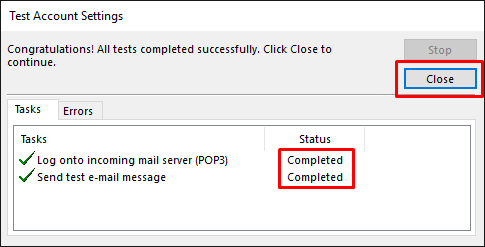
If you get messages that tests were unsuccessful, please re-check all details in your configuration and when you are sure they are correct and you still get error messages, contact your hosting/email provider for assistance.
Click Close if the tests were successful. - After successful configuration of your email account in Outlook you should see this window:
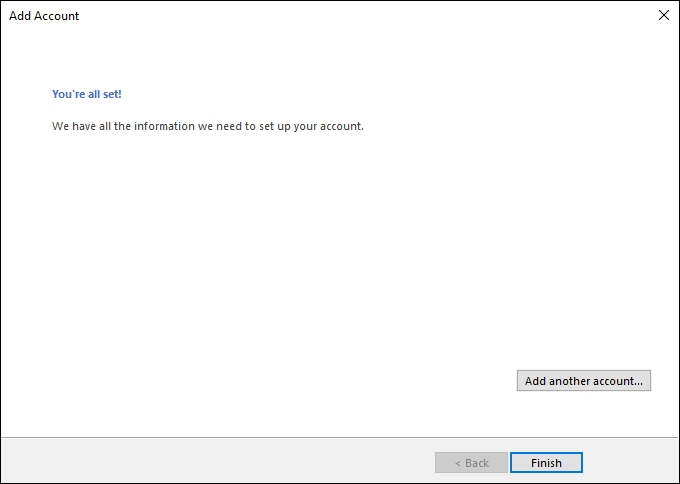
You can now click Finish and use your email account configured on Outlook.
Conclusion
You have learned how to setup an email account on Outlook so you could send and receive messages there instead of your original email provider platform.
** You can also check your mails via webmail through http://webmail.shleeq.com


Leave A Comment